A home podcast studio can cost almost nothing if you already own a computer or smartphone, or several thousand dollars if you build a permanent multi-camera room.
For most solo podcasters, though, you don’t need anything close to a commercial studio budget.
A practical way to think about it is this:
| Home podcast setup | Planning budget |
|---|---|
| Use equipment you already own | $0–$100 |
| Simple solo USB setup | $150–$400 |
| Dedicated solo XLR setup | $350–$800 |
| Polished audio + video setup | $700–$1,500 |
| Permanent multi-person video studio | $1,500–$4,000+ |
These are planning ranges, not industry averages or current retail quotes. Your actual cost depends on what you already own, how many people you record, whether you need video, and how much work your room needs.
And that is the part a lot of podcast gear guides miss.
The real question isn’t:
How much does a podcast studio cost?
It’s:
What does your podcast actually require?
You can spend $3,000 building a beautiful room with lights, cameras, wood slats, a television, and the legally required podcast fake plant…and still have a setup that is completely wrong for the way you record.
Start with the show. Then build the studio around it.
What Actually Determines the Cost of a Home Podcast Studio?
Five decisions drive most of your studio budget:
- Are you recording alone or with people in the room?
- Are your guests local or remote?
- Are you producing audio only or audio and video?
- What equipment do you already own?
- How difficult is your room acoustically?
A solo host recording into a laptop needs a very different system from two people recording video interviews across a table.
That sounds obvious, but I have seen a lot of podcast setups built in the opposite order: buy the cool gear first, then figure out what the show needs it for.
If you haven’t chosen your equipment yet, start with my guide to what equipment you actually need to start a podcast.
This article is about deciding how much of that equipment you need to buy.
Budget Level 1: Start With What You Already Own — $0 to $100
You may not need to buy a microphone before recording your first episode.
If you already have a reasonably modern computer, tablet, or smartphone, you have enough equipment to test an idea, record practice episodes, build an episode format, and determine whether the show is actually going to happen.
Your first expenses might be nothing more than:
- a phone mount;
- inexpensive wired headphones;
- a basic desktop stand;
- a cable or adapter.
Is this the ultimate studio?
No.
But there is something worse than recording your first episode on modest equipment: spending $2,000 on a podcast you never get around to recording.
Your first setup only needs to be good enough to learn what the next problem actually is.
Budget Level 2: A Simple Solo USB Setup — $150 to $400
For a solo podcaster, USB can eliminate a surprising amount of hardware.
A good USB microphone may connect directly to your computer and, depending on the model, provide headphone monitoring and processing without requiring a separate audio interface.
For example, current microphones such as RØDE’s PodMic USB provide both USB and XLR connectivity, onboard processing, and a headphone output. The NT-USB+ similarly includes USB connectivity, headphone monitoring, and onboard processing through compatible RØDE software.
A simple setup may consist of:
- USB microphone;
- wired headphones;
- microphone stand or boom;
- computer;
- recording software.
That’s enough for a very capable solo podcast.
And you haven’t bought an interface, mixer, inline preamp, patch bay, rack case, or seventeen blinking boxes whose primary job appears to be making your desk look important.
If your podcast is mainly solo teaching, commentary, remote interviews, or video recorded at a desk, this may be all the studio you actually need.
Budget Level 3: A Dedicated XLR Solo Setup — $350 to $800
XLR starts making more sense when you want a modular system that can expand.
A typical setup includes:
- XLR microphone;
- audio interface;
- XLR cable;
- headphones;
- microphone arm or stand;
- computer;
- recording software.
The interface is what turns the microphone’s analog signal into digital audio your computer can record.
As a current point of reference, Focusrite lists its fourth-generation Scarlett Solo at $159.99. Shure currently positions its MV7+ at a $279 starting price, although that particular microphone also includes USB connectivity.
So it is very easy for a microphone and interface alone to move a setup beyond $400 before you add headphones, cables, mounting, or room improvements.
That doesn’t mean an XLR setup is a bad investment.
It means you should have a reason for buying one.
If USB already solves your problem, adding an interface doesn’t make the episode more interesting.
Where I Would Spend Money First
1. The Recording Environment
Your room matters more than most people expect.
Hard floors, bare walls, glass, large flat surfaces, loud air conditioning, computer fans, and outside noise can all become part of the recording.
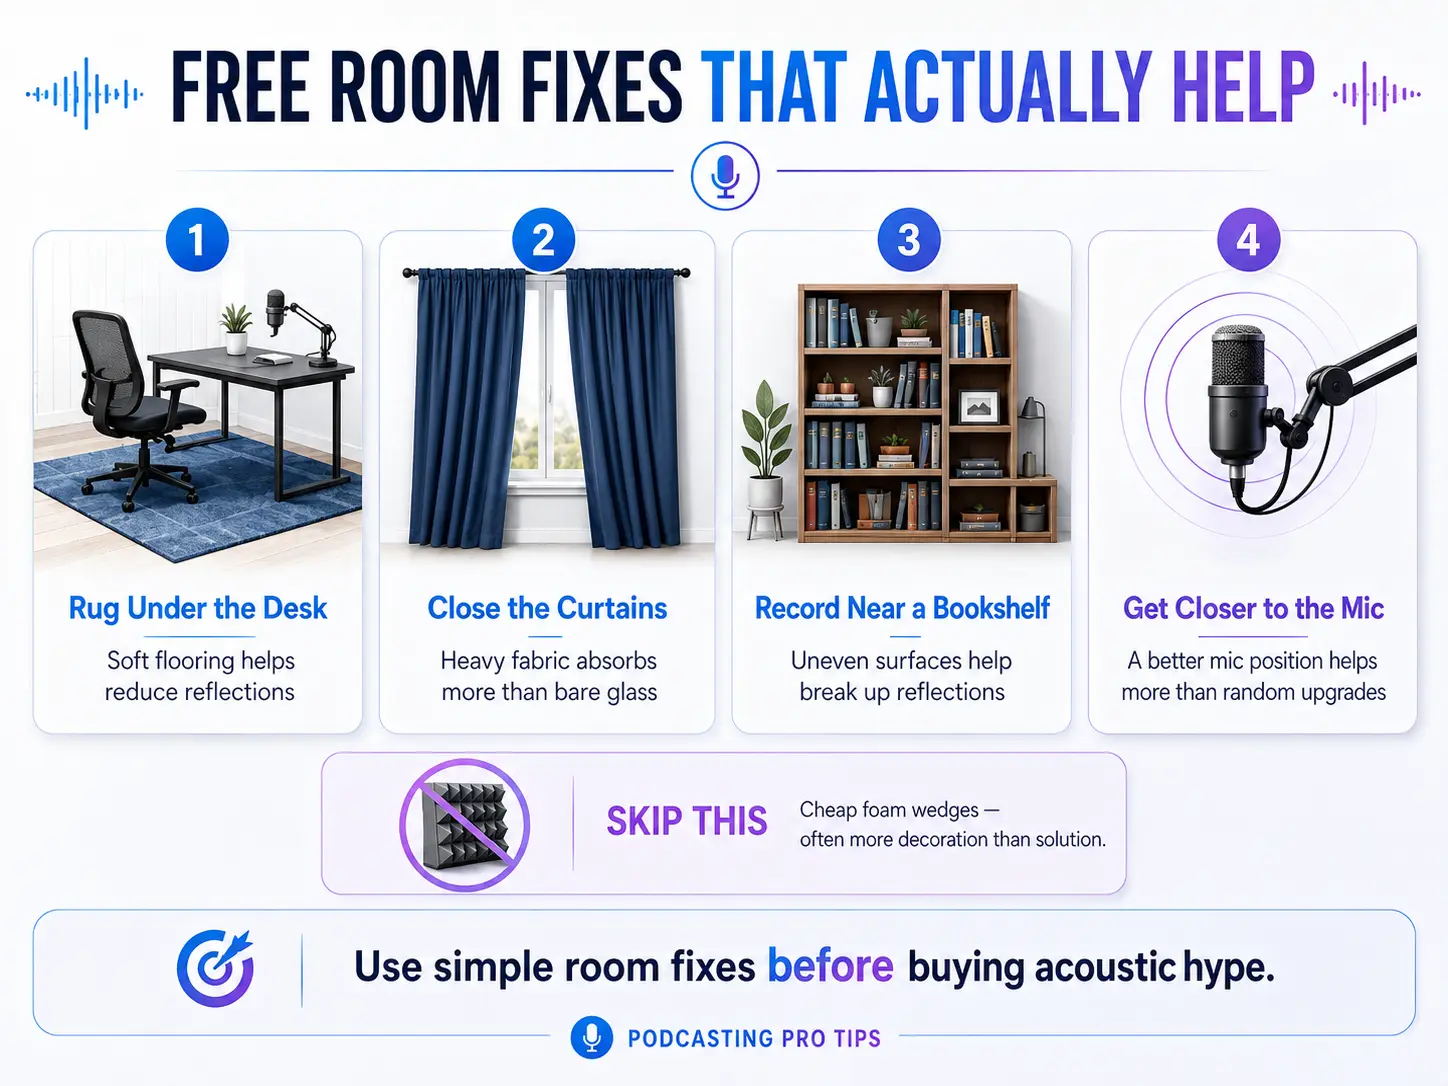
Before buying acoustic treatment, use the free fixes first:
- move away from reflective walls;
- get closer to the microphone;
- close doors and windows;
- turn off unnecessary noise sources;
- add existing soft furnishings where appropriate;
- test different positions in the room.
These aren’t substitutes for engineered acoustic treatment. They are simply sensible things to test before ordering a wall full of panels.
2. A Microphone That Fits the Room and Workflow
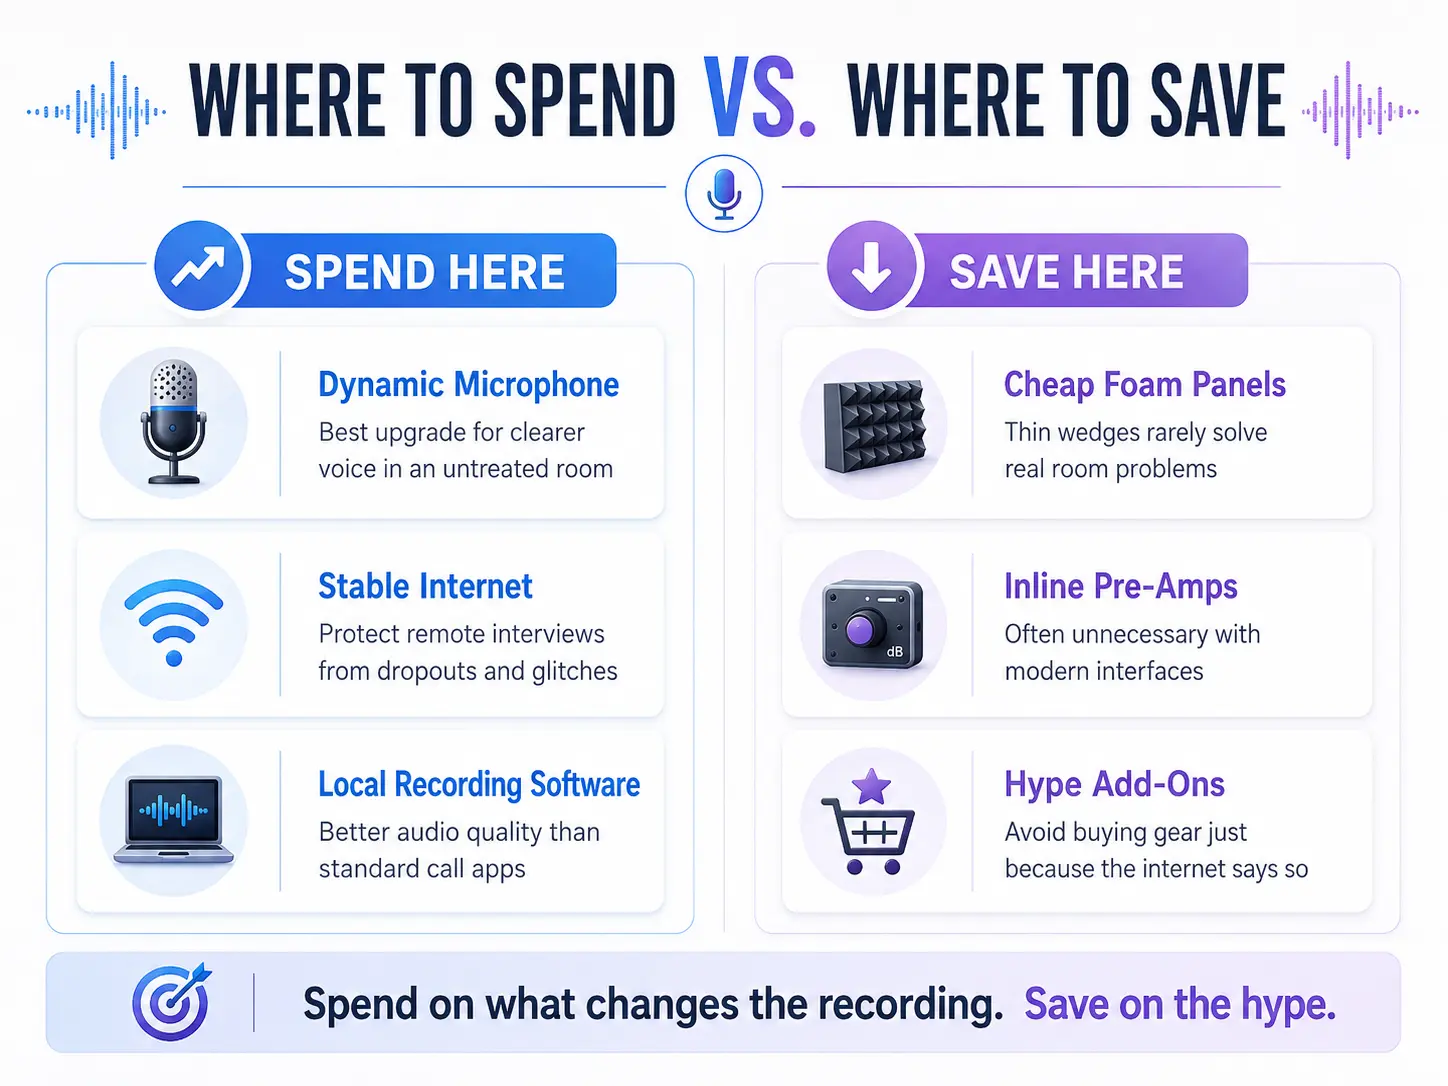
For spoken-word recording in an imperfect home environment, a close-positioned cardioid dynamic microphone is often a practical choice.
But don’t turn that into the internet rule that “condenser microphones are bad for podcasts.”
They aren’t.
Microphone type is only part of the system. Placement, polar pattern, room acoustics, gain structure, speaking distance, and technique matter too.
The better question is:
Which microphone makes it easiest to capture a clean voice in this particular room?
That may be a dynamic microphone.
It may also be a well-positioned condenser in an appropriate space.
3. Microphone Positioning
A $300 microphone two feet away from your mouth can easily create a bigger problem than a less expensive microphone positioned correctly.
A solid microphone arm or stand isn’t a glamorous purchase, but it lets you place the mic where it needs to be and keep it there.
That is money doing an actual job.
4. Monitoring
Use wired headphones when you need to monitor while recording.
They let you hear problems before you discover them during editing.
A buzz, clipping, rubbing cable, air conditioner, or guest microphone problem is much cheaper to fix at minute two than after a 45-minute interview.
5. Lighting Before an Expensive Camera
If video is part of the show, don’t assume the camera should receive your entire remaining budget.
Lighting, framing, background, lens position, and exposure can have a major effect on the image.
A phone or existing camera with decent lighting can be a smarter starting point than buying an expensive camera and putting it under the same ceiling light you use to find your car keys.
If you’re trying to decide whether you actually need higher-resolution video equipment, see my breakdown of 4K vs. 1080p for video podcasting.
Where I Would Save Money
1. Don’t Buy an Audio Interface If You Don’t Need One
If your USB microphone already gives you the inputs, monitoring, and recording quality you need, you don’t earn extra podcast points for inserting another box between the microphone and computer.
Buy an interface when the workflow requires it.
Not because somebody drew one in a podcast signal-chain diagram.
2. Don’t Automatically Buy an Inline Gain Booster
Inline microphone preamps such as Cloudlifters have legitimate applications.
But they are not a mandatory podcast purchase.
Modern interfaces can provide substantial microphone gain. Focusrite, for example, specifies up to +57 dB of microphone gain on its fourth-generation Scarlett Solo.
Whether you need additional gain depends on the microphone output, how loudly you speak, microphone distance, the preamp, and the noise performance of the complete signal chain.
Set up the actual system first.
Then solve a gain problem if you have one.
3. Don’t Confuse Acoustic Foam With Soundproofing
Acoustic treatment and soundproofing are different jobs.
Treatment changes what sound does inside the room.
Soundproofing attempts to reduce sound traveling into or out of the room.
Those little foam squares on the wall aren’t going to stop a lawn mower, traffic, your neighbor, or someone running a blender in the kitchen.
Foam can absorb some higher-frequency sound, but thin foam is much less effective in the lower frequencies than thicker broadband absorbers.
If the room really needs treatment, spend intelligently instead of covering every visible surface with two-inch foam.
4. Don’t Build the Set Before You Build the Show
Wood slats.
Neon logo.
Three cameras.
Accent lights.
Television.
Couch.
Fake plant number two.
None of those are inherently bad purchases.
They become bad purchases when you’re spending money on the appearance of a podcast before you’ve figured out how the podcast is going to work.
If video presentation matters to the brand, invest in it.
Just make that a decision instead of an imitation.
The Hidden Cost: Software and Production Time
Hardware is only part of your podcast studio cost.
Your ongoing system may also include:
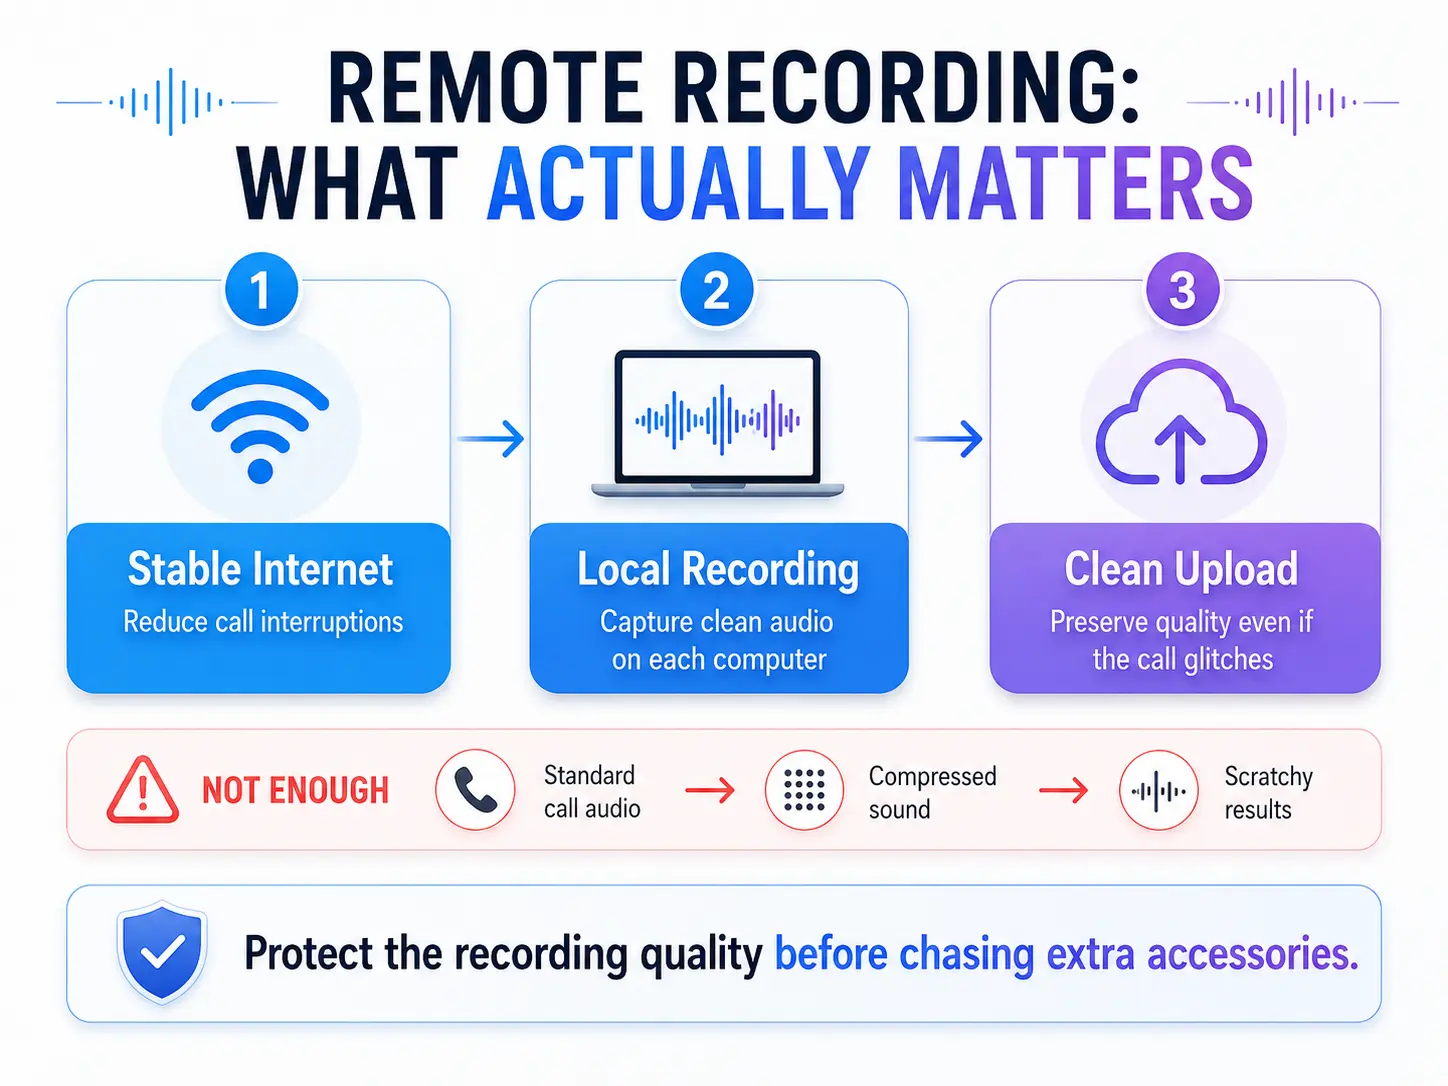
- remote recording software;
- editing software;
- cloud storage;
- backup storage;
- transcription;
- graphic or video tools;
- music licensing;
- hosting;
- replacement cables and accessories.
Then there is the expense that rarely appears in a gear guide:
your time.
A $200 equipment upgrade that saves you two hours of troubleshooting every recording session may be a better purchase than a $600 camera upgrade nobody notices.
That is why workflow matters.
For a deeper look at the production side, see the automated podcast workflow blueprint.
The Smartest Order for Building a Home Podcast Studio
If I were building a new home podcast studio, I would do it in this order:
- Decide what kind of podcast I am actually producing.
- Record with equipment I already own where possible.
- Fix the biggest audible problem.
- Improve microphone positioning and monitoring.
- Add dedicated audio equipment when the workflow requires it.
- Add video only when video serves the show.
- Improve the room after I know what the room actually needs.
- Upgrade the bottleneck instead of replacing everything.
That keeps the studio connected to the production model instead of turning equipment shopping into the production model.
Pre-production matters here too. Deciding how the show will actually be recorded before buying equipment can prevent a lot of expensive corrections later. See why podcast pre-production matters.
So, How Much Should You Spend?
For most people starting a home podcast, I would not begin with a dollar target.
I would begin with the smallest system that reliably produces the kind of show you intend to make.
If that’s your existing computer and phone, start there.
If a $250–$400 solo setup fixes the real problems, great.
If your business requires a permanent two-person video studio, your budget will naturally be higher.
The goal isn’t to build the cheapest podcast studio.
And it isn’t to build the most impressive one.
The goal is to spend money where it improves the recording, workflow, consistency, or usefulness of the show.
Everything else can wait.
Build the Podcast System Before You Overbuild the Studio
Equipment is downstream from bigger decisions.
Who is this show for?
What is it supposed to accomplish?
What format can you produce consistently?
What happens after somebody listens?
How will you know whether the show is doing anything useful?
That is the larger problem the Podcast Business System + Podcast Production OS is designed to solve: define the business and production system behind the podcast, then produce from those decisions instead of rebuilding the show one episode at a time. That pathway matches the approved Podcasting Pro Tips offer architecture.
You don’t need more gear just because you’re starting a podcast.
You need the right system for the podcast you’re actually building.
Home Podcast Studio Cost FAQ
Can you start a home podcast for free?
Yes, if you already own a computer, tablet, or smartphone capable of recording audio, you can start testing and recording without purchasing a complete studio. The first upgrade should solve a real recording problem rather than simply make the setup look more professional.
Do I need to spend $2,000 on a podcast studio?
No. A solo audio podcast can be produced with a much smaller setup. Costs rise when you add multiple local hosts, dedicated cameras, lighting, acoustic treatment, mixers, furniture, and permanent studio infrastructure.
Should I buy a dynamic or condenser microphone for a home podcast?
Neither microphone type is automatically correct. Dynamic cardioid microphones are often practical in imperfect rooms because they are commonly used close to the speaker, but a properly positioned condenser can also work well. Choose based on the room, voice, recording distance, polar pattern, and workflow rather than microphone type alone. RØDE, for example, currently markets both dynamic podcast microphones and condenser USB microphones for spoken-word/home recording applications.
Is acoustic foam worth buying?
It can help control some higher-frequency reflections, but thin foam should not be mistaken for broadband room treatment or soundproofing. Low-frequency control generally requires substantially deeper treatment.