Starting a podcast is one of the single most effective ways to share your perspective, build a dedicated community, and establish real authority in your professional niche. But if you look up a guide on how to do it online, you get buried under 5,000 words of technical gatekeeping and endless lists of software to buy.
It makes the process look overwhelming. In reality, launching a great show comes down to a few simple, intentional decisions. Let’s strip away the noise and look at the exact operational steps required to get your show off the ground and out into the world.
Step 1: Focus Your Concept (Stop Talking to the Void)
Before you buy a single piece of equipment, you have to know exactly why your show exists. The internet does not need another generic talk show where two friends get on mic and “chat about business.” You need a tight, specific hook.
Instead of aiming for a massive, broad audience, narrow your sights. Don’t make a “real estate podcast”—make a podcast specifically about how luxury real estate agents can leverage short-form video to land listings. The tighter your niche, the easier it is to rank in search results and build a deeply loyal core following.
Step 2: Choose a Format That Fits Your Schedule
Consistency is the absolute engine of podcast growth. If you pick a format that takes 20 hours a week to produce, you will quit within two months. Decide on a structure that respects your calendar:
- Solo Nuggets: Tightly scripted, 10-minute high-value education blocks. (Perfect for coaches and consultants).
- The Interview Track: Hosting industry guests to dissect their specific case studies.
- Co-Hosted Ecosystems: Partnering with a peer to debate industry trends.
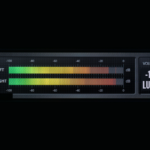
Step 3: Secure the Correct Audio Gatekeeper
Your microphone is your primary interface with your listener. If your audio sounds echoey, hollow, or scratchy, people will drop off your episode within the first 60 seconds. You do not need a million-dollar setup, but you do need to avoid sensitive condenser mics. Buy a reliable dynamic USB or XLR microphone (like the Audio-Technica ATR2100x or Samson Q2U). These are engineered to ignore background room noise and capture your voice cleanly, even in an untreated spare office.
Step 4: Use Dedicated Remote Recording Hardware
If you are recording remote interviews, stop relying on standard Zoom or Microsoft Teams audio. Zoom heavily compresses your voice tracks to prevent call lag, which leaves your audio sounding thin and metallic. Use a dedicated browser platform like Riverside.fm. These platforms record uncompressed, high-definition audio and video tracks directly on your local computer and your guest’s computer, then seamlessly upload them to the cloud. Even if your internet connection drops or glitches mid-call, your master file remains perfect.
Step 5: Pick a Dedicated Media Host
You cannot upload an MP3 audio file directly to Apple Podcasts or Spotify. You need a Podcast Hosting Platform (like Audacy Creator Lab, Transistor, Buzzsprout, or RSS.com). Your host stores your audio files, generates your unique master RSS feed link, and automatically distributes your episodes out to every major directory across the globe the second you click publish.
Stop overthinking the process. Nail your core concept, pick a simple dynamic mic, plug into a solid media host, and start shipping value.